
Normally Linux distribution ISOs work perfectly when written to a USB for booting as a 'Live USB' allowing both usage and installation of the distro. Unfortunately with the introduction of Intel Atom based mini PCs and tablets the issue of requiring a 32-bit bootloader to boot a 64-bit OS arose. Further complications were caused by the lack of 'mainline' support for HDMI audio and wifi/bluetooth resulting in the need for custom kernels. Although some Linux distros can work OOTB I found that for Ubuntu it wasn't that simple.
To solve the limitations of using a standard ISO I developed a script that allows an ISO to be respun and customized ("remastered") to create a new ISO. Being a script which you run locally it means you can both see and control how your ISO is respun. I wanted flexibility in the ability to:
- Add a GRUB 32-bit bootloader to allow ISOs to boot on the many Intel Atom devices limited by their BIOS or to add the rEFInd boot manager to allow booting on Intel Apollo Lake devices.
- Upgrade the kernel to the latest or to a specific version to benefit from recent patch functionality e.g. for audio and wifi/bluetooth.
- Add (or remove) repositories, software packages, scripts and files to allow the installation of firmware and favourite programs.
- Preseed or perform set-up commands and scripts and also change system defaults.
- Add persistence so that the ISO can retain data, installed software packages and settings across reboots.
It can be run using either the shell CLI (command line interface) in a the terminal or using its GUI (graphical user interface). Not only will it generate a new ISO but it will also produce a log file which includes the options used when respinning the ISO and serves to document the respun ISO.
Although it is expected to run the script on a Linux machine it also works on a Linux virtual machine on Windows (see below for further details). You will need certain packages like 'squashfs-tools' and 'xorriso' installed (use 'sudo apt-get install -y squashfs-tools xorriso' to install them) plus 'zenity' if you want to use the GUI. As different Linux distros have different packages installed by default the script will first check and notify you if any other packages are required. You will also need at least 10 GB of free space but this can be on external storage (e.g. a USB) as it can be specified as a location different to where the script is run from. For some options (such as updating the kernel) you will need a working internet connection as the script needs to download software. Finally as the script runs some commands (e.g. mount/umount) which require root access using the 'sudo' command you will initially be prompted for your password and must already have 'sudo' privileges.
Invocation
Running the script is really quite simple even though there are quite a lot of features or options making it look rather complex.
Usage: /usr/local/bin/isorespin.sh [ -h | -v ]
/usr/local/bin/isorespin.sh -i <ISO> [ [ -u | -k <kernel> ] | -r "repo ... " | -p "pkg ... " | -l "pkg.deb ... " | -f "file | directory ... " | [ [ -s <size><MB | GB> ] | [ -b <GRUB | rEFInd> ] ] ...
/usr/local/bin/isorespin.sh ... -w <directory> | -d "pkg ... " | -e "pkg ... " | -c "cmd ... " | -o "file | directory ... " ]

Respinng an ISO is controlled by either running the script with flags and arguments (CLI) or selection options and values (GUI) and briefly these are as follows:
-h or --help will display the 'usage' message.
-v or --version displays the version of the script.
-i or --iso must be specified and is the name (including the full or relative path) of the ISO to be respun.
-u or --update will update the kernel to the latest Ubuntu Kernel Team kernel builds located at http://kernel.ubuntu.com/~kernel-ppa/mainline.
-k or --kernel replaces the kernel with the version specified by the argument or value which can be any of the Ubuntu Kernel Team kernel builds located at http://kernel.ubuntu.com/~kernel-ppa/mainline and is passed as the directory or folder name without the trailing '/' (e.g. '--kernel v4.11-rc7').
-r or --repository adds the specified repository to the respun ISO.
-p or --package will install a single package or a set of packages (if enclosed in quotes) that are available to the ISO and would typically be installed using the 'apt-get install <package>' command. This option is very useful in preseeding your ISO with packages you always normally install immediately after booting and will help resolve the issue of the ISO running out of space as a result of multiple installations. For example I typically include "ssh openssh-server inxi" when respinning an ISO for personal use.
-l or --local allows local Debian binary packages to be installed within the respun ISO. Care must be taken in specifying the order of multiple packages to preserve any dependencies and of course all dependencies must be met for the packages to be successfully installed.
-f or --file will copy either the specified files or directories to the respun ISO under '/usr/local/bin'. Although intended to allow local binaries or shell scripts to be saved on the respun ISO there is no limitation on the actual type of file that can be added.
-s or --storage adds a specified amount of persistent storage to the respun ISO. A size must be specified although there is some flexibility on how much is allocated. The minimum size is 128MB which keeps the size of the ISO down but means that once a USB is created the persistence partition needs to be manually resized for normal usage. Alternatively a larger size can be specified to avoid the immediate need to resize as this can always be performed later. It is recommended to use a realistic amount somewhere between 1GB and 2GB to maintain the balance between a practical but usable ISO. When creating a respun ISO with persistence the rEFInd boot manager will automatically be selected. When using the GUI the persistence partition size can be defined using the slider which limits the size between 128MB and 2048MB.
-b or --boot will add either the GRUB boot loader (which is added by default) or the rEFInd boot manager which currently is required for booting on a lot of the current Intel Apollo Lake devices.
-w or --work-directory is used to specify where the ISO will be respun. This is primarily for overcoming the lack of space associated with mini PCs and allows the respinning to be run on temporarily connected external storage media such as a drive or USB. Once the storage has been connected and mounted it can be passed as a parameter. Likewise if a directory is then created on the mounted storage this can be passed as the argument or value for this option to ensure there is sufficient space (i.e. at least 10 GB) for the script to run.
-d or --download will download Debian binary packages from the respun ISO using the 'apt-get download' command and save them under '/usr/src'. If combined with the '-o' option the Debian binary package will be accessible after respinning the ISO.
-e or --erase will remove Debian binary packages from the respun ISO using the 'apt-get purge' command.
-c or --command will execute the supplied argument as a 'bash' command. Care must be taken when embedding single or double quotes within the argument as they are subject to interpretation. For more complex commands it is often both advisable and easier to write a simple shell script and use the '-c' option to execute it as part of respinning.
-o or --output will save either the specified files or directories to an output directory called 'isorespin'. This is very useful when wanting to extract files or packages that have been created or downloaded as part of respinning the ISO.
The script can either be run as a local script or it can be installed by copying the script to '/usr/local/bin' where it will be accessible for all users. Depending on the options and their complexity the respinning will take quite a few minutes and the script provides updates on its progress whilst running. The respun ISO is created with a new name derived from the original ISO name and includes indicators of the options used like 'persistence' or the kernel version for example with full details being written to the log file.
Once the ISO has been respun it can be written to a USB using the standard 'dd' command.
The examples below illustrate the various options through scenarios and provide a basic tutorial to using the script. They are based on the script being installed to '/usr/local/bin':
The script's help is displayed using the command:
isorespin.sh -h
The version of the script can either be displayed by entering:
isorespin.sh -v

or it can be seen from the top of the script's 'main' menu:

or 'advanced' menu:
The script can be run using the CLI by specifying options with arguments in any order. If the script is started without any parameters it first checks to see if it can run the GUI and if so starts with the main selection menu where all required options should be selected. As seen above the GUI uses two menus with the first being a main menu of most frequently used options and an optional additional menu of the more advance options. For each option selected, a sub-menu will appear to allow the choice or value to be entered.
Respinning an ISO
The simplest usage is to respin an ISO which will automatically add the GRUB 32-bit bootloader allowing the respun ISO to boot on Intel Atom devices e.g.:
isorespin.sh -i ubuntu-17.04-desktop-amd64.iso
or by invoking the GUI:


Upgrading the kernel
To respin the ISO with the latest kernel the command would be:
isorespin.sh -i ubuntu-17.04-desktop-amd64.iso -u
or

If a specific kernel was required for example 'v4.11.6' then the '-k' option would be used:
isorespin.sh -i ubuntu-17.04-desktop-amd64.iso -k v4.11.6
or
Adding local packages and running scripts
A more complex scenario of respinning an ISO is when you want to add packages and run scripts to fix functionality like wifi/bt and audio.
Due to current limitations of the official ISOs I've previously created scripts to add wifi/bt firmware and also add the ALSA UCM audio files:
rtl8723bs_4.12.0_amd64.deb
rtl8723bt_4.12.0_amd64.deb
linuxium-install-broadcom-drivers.sh
linuxium-install-UCM-files.sh
These can be incorporated when respinning an ISO. For the scripts you first add the file using the '-f' option and then execute the script using the '-c' option.
When I wrote the above scripts I originally intended them to be run post installation rather than as part of respinning an ISO. As a result they produce warnings and also need to be executed in the correct directory. Rather than writing a complex '-c' parameter to run them correctly it is simpler to write a further script (which I call a 'wrapper') which controls how the script is run. These 'wrappers' can then be included as part of respinning an ISO:
wrapper-linuxium-install-broadcom-drivers.sh
wrapper-linuxium-install-UCM-files.sh
For example the following command will respin the Ubuntu 17.04 ISO and upgrade the kernel to the latest version (which includes the RTL8723BS driver) installs the required RTL8723BS wifi/bt firmware and both adds and runs a script to include the UCM files for audio:
isorespin.sh -i ubuntu-17.04-desktop-amd64.iso -u -l rtl8723bs_4.12.0_amd64.deb
-f linuxium-install-UCM-files.sh -f wrapper-linuxium-install-UCM-files.sh
-c wrapper-linuxium-install-UCM-files.sh
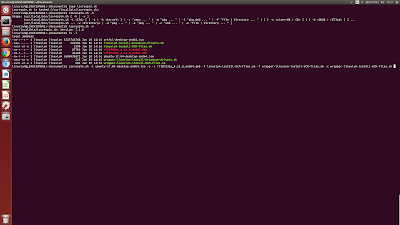
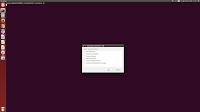
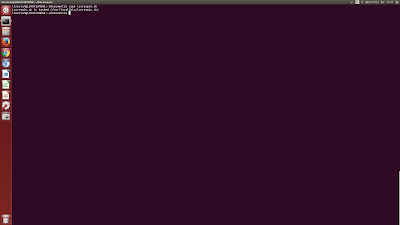
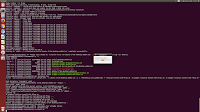
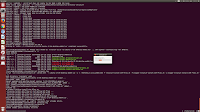
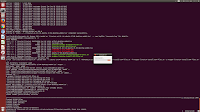
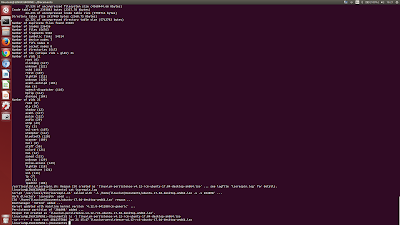
While the script is running progress updates are displayed:

until it finally completes:
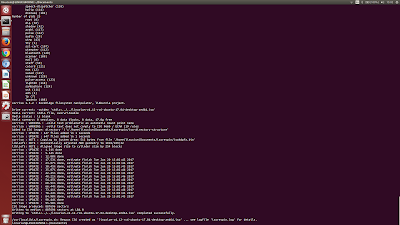
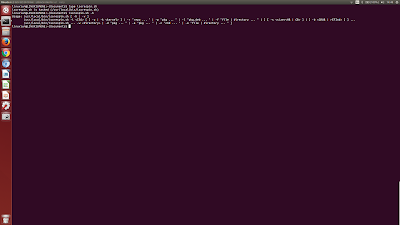
producing a log file which shows how the script was run:

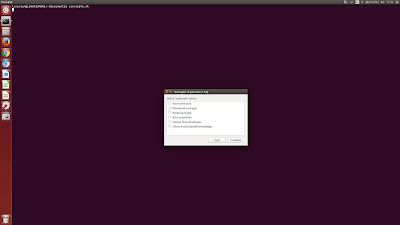
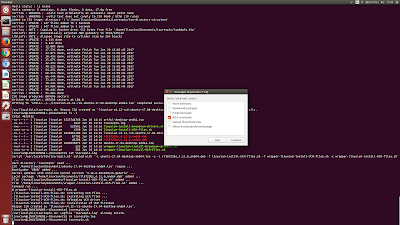
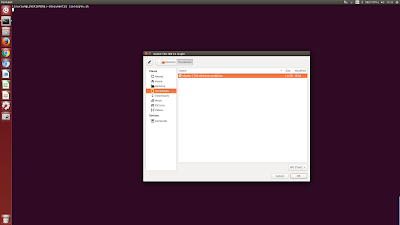
A similar example but respinning the daily snapshot Ubuntu 17.10 (Artful) ISO and using the GUI starts by selecting the required options:
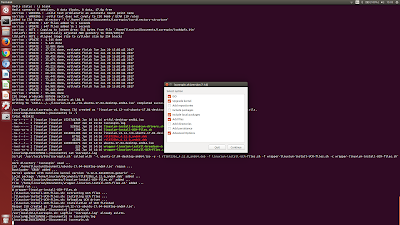
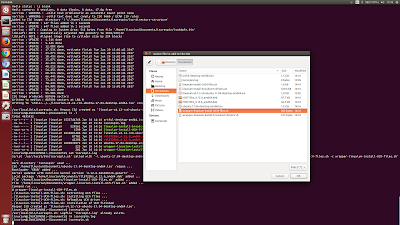
and then entering the values starting with the ISO. When selecting the ISO a 'file manager' styled window will be presented but only files ending with a '.iso' suffix will be displayed:

For the kernel upgrade option the choice is to upgrade to the latest mainline version:

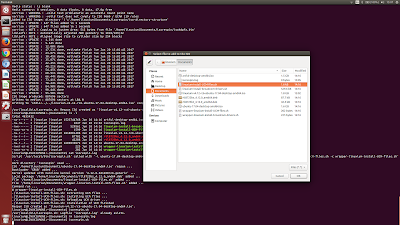
Local packages are selected using the 'file manager' which only displays '.deb' files. To allow multiple entries you will be asked after each selection is made whether a further addition is required:


Next the two scripts are added using the 'file manager':

And finally the 'advanced' menu is displayed and after selecting the option to add a command:
the command is entered as a text string:
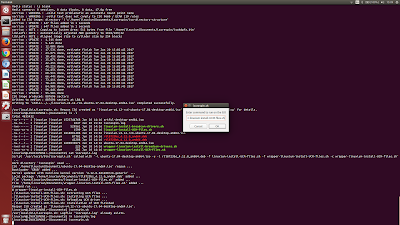
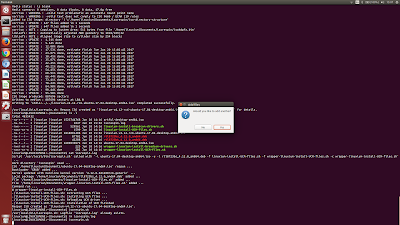
Now that all the selected options have been entered a confirmation screen is be displayed which shows the full command as it would look if the script had been run manually:
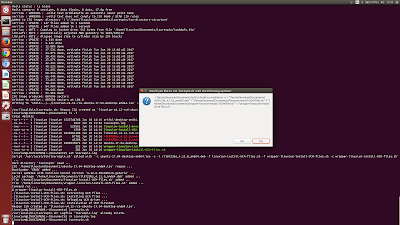
Having selected 'yes' the script runs and displays its progress:
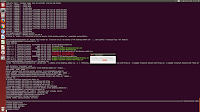


until it finishes:
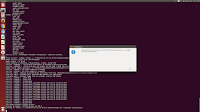

Similarly a log file is produced that shows how the script was run:

For a more complex example of using the script see Compiling your own kernel using 'isorespin.sh'.
Persistence
Adding persistence to an ISO is useful as it means that you can retain your data, installed software packages and settings between reboots. Persistence can be added as part of any ISO respinning simply by adding the '-s' option and defining the size of the storage to be permanently allocated in the ISO. As previously mentioned there is a balance between making it small and therefore resulting in a small ISO that requires resizing once booted (see below) verses a larger size and a corresponding larger ISO.
The following example respins the standard Ubuntu 17.04 ISO with the latest kernel and create a 2 GB persistence partition:
isorespin.sh -i ubuntu-17.04-desktop-amd64.iso -u -s 2 GB
Using the GUI it is created by:


As can be seen from looking at the size of the resulting ISO that it is large at around 3.8 GB but not too large to be totally impractical.
Creating a LiveUSB
Once your respun ISO has been created you can write it to a USB using 'dd'. For example if your USB is '/dev/sdb' then enter:
dd if=linuxium-v4.12-rc6-ubuntu-17.04-desktop-amd64.iso of=/dev/sdb bs=4M
Make sure you select the correct device for the USB and always check first using commands like 'df', 'blkid' or 'lsblk' to confirm. ISOs can also be written to a USB using 'Rufus' on Windows if preferred.
Booting your respun ISO
Having created the USB with your respun ISO the following information may be useful when booting and running.
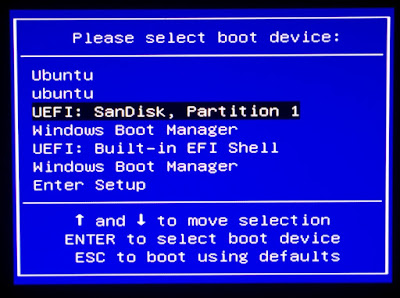
To boot your device select the USB's UEFI partition from the device's boot menu:
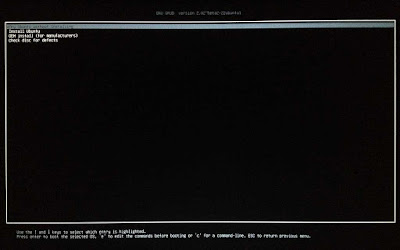
Normally you will then see a standard GRUB menu:
If the 'rEFInd' boot manger was installed (either through selection or automatically due to persistence) the following screen will be displayed for 64-bit bootloader devices:

otherwise for 32-bit bootloader devices the normal the GRUB menu screen is displayed and after selection a black screen with the following message is briefly displayed:
error: no suitable video mode found.
Booting in blind mode
before the normal Ubuntu splash screen appears and the device fully boots. This 'error' can safely be ignored.
Wifi issues
If your device uses a Broadcom wifi chip and wifi isn't working even after adding the firmware using my script then it may be missing an SDIO file. By running the command 'dmesg' immediately after booting and looking at the output if you see messages showing that the wifi firmware 'txt' file is missing it is possible to use the copy from the Windows driver that is stored in NVRAM. The file should look something like '/sys/firmware/efi/efivars/nvram-74b00bd9-805a-4d61-b51f-43268123d113' and you actually copy it using 'cat /sys/firmware/efi/efivars/nvram-74b00bd9-805a-4d61-b51f-43268123d113 > /lib/firmware/brcm/brcm/brcmfmac43241b4-sdio.txt' substituting the actual NVRAM filename on your device and the correct *sdio.txt name for your driver.
Bluetooth issues
On booting if bluetooth fails to work automatically and the firmware was installed using one of my scripts then the service can be manually started with the command:
sudo systemctl start rtl8723bsbt.service
or
sudo systemctl start brcmbt.service
depending on device's chip. If bluetooth is always required then the command could be included in '/etc/rc.local' to avoid this step. Note that this uses 'systemd' so earlier ISO releases without 'systemd' cannot use my scripts to provide bluetooth.
Resizing the persistence partition
Once booted use the 'gparted' command to resize the persistence partition. You will initially be prompted to fix the GPT to use all the available space so click 'Fix'


NVRAM sync issues
Sometimes after installing your device only boots to a black screen. Typically this happens when the NVRAM and ESP are out of sync. This can be easily fixed by performing the following:
1. Start with the device switched off.
2. Connect your LiveUSB.
3. Power on the device and press the relevant function key or key sequence to boot from the LiveUSB.
4. Open a terminal windows and enter:
type efibootmgr5. If the 'efibootmgr' is not installed enter:
sudo apt-get update && sudo apt-get install -y efibootmgr
6. Next remove any boot entries that may have been created through the earlier installs by entering:
for BOOTENTRY in 0 1 2 3 4 5 6 7 8 9
do
sudo efibootmgr -b ${BOOTENTRY} -B
done
do
sudo efibootmgr -b ${BOOTENTRY} -B
done
7. Now create an Ubuntu boot entry by entering:
sudo efibootmgr -c -d /dev/mmcblk0 -p 1 -l \\EFI\\ubuntu\\grubx64.efi -L Ubuntu
8. Remove the LiveUSB and reboot from the newly created Ubuntu entry.
Note: If you have a dual boot installation then the ESP partition may be the second partition so modify the '-p 1' in the command above to '-p 2' or to whatever the ESP partition is. Likewise for some devices the eMMC is '/dev/mmcblk1' and not '/dev/mmcblk0' so again modify the command as appropriate. If your device uses a 32-bootloader then use 'bootia32.efi' rather than 'grubx64.efi' in the command. It also sometimes doesn't work first time and requires all the steps to be repeated which should then fix the issue.
Additional information regarding the script
Minimizing repeated downloads
The rEFInd boot manager (http://www.rodsbooks.com/refind) can be downloaded from https://sourceforge.net/projects/refind/files into the same directory as the script is run from to prevent unnecessary repeated downloads if this is a concern and will make processing quicker.
The rEFInd boot manager (http://www.rodsbooks.com/refind) can be downloaded from https://sourceforge.net/projects/refind/files into the same directory as the script is run from to prevent unnecessary repeated downloads if this is a concern and will make processing quicker.
Avoiding new windows opening when respinning
To prevent the file manager opening a window each time the script mounts a temporary file system I have run the command 'gsettings set org.gnome.desktop.media-handling automount-open false' first on my system.
Lock file
The script creates a lock file '.isorespin.sh.lock' in the directory where it is run from in order to ensure exclusive access to the run-time environment. If the script or machine crashes this lock file may need to be removed in order to rerun the script and you will be prompted should this occur. However it is not recommended to run the script in parallel from multiple directories as it is both CPU and I/O intensive and severe performance degradation would occur.
Running the script on Windows
First download and install Oracle's VirtualBox on Windows and then create a Linux VM from a standard Ubuntu 64-bit desktop ISO and install to a VDI of fixed size (minimum 20GB). Start the new Ubuntu VM and install 'Oracle VM VirtualBox Extension Pack'. You can then download my 'isorespin.sh' script to respin the Ubuntu-based ISO of choice. By installing the extension pack you will also be able to write the respun ISO to a USB using 'dd' from within the Ubuntu VM. Unfortunately 'Bash on Ubuntu on Windows' using 'Windows Subsystem for Linux' does not support 'loop' devices which are required by my script so an Ubuntu VM is the only working alternative at this time.
The Linux mainline kernel
It is worth noting that certain releases of the mainline kernel include specific core functionality:
v4.9 includes the eMMC v5.0 driver required for accessing the internal storage in many devices.
v4.11 includes the HDMI audio driver.
v4.12 includes the RTL8723BS driver although you will still need the wifi/bt firmware.
Kernel freezes
Well known and well documented without a permanent fix or so it seems. Kernels after v3.16 seem to include something that caused them to randomly freeze on Intel Atom devices and then the whole system hangs. Subsequently an accepted workaround was recommended to limit the processor (CPU) to a certain power state or 'C-state' and if freezes are encountered then to pass 'intel_idle.max_cstate=1' as a boot parameter. Later kernels have included patches and the current state seems to be reliable enough to ignore the workaround. If however freezes still occur the easiest way to implement the workaround on an installed system is to edit the file '/boot/grub/grub.cfg' and modify to look like:
GRUB_CMDLINE_LINUX_DEFAULT="intel_idle.max_cstate=1"
Alternatively the following command can be entered:
sudo sed -i 's/\(GRUB_CMDLINE_LINUX=\)""/\1"intel_idle.max_cstate=1"/' /etc/default/grubfollowed by:
sudo update-gruband then a reboot as the change only needs to be made once typically following installation.
Micro SD card issues
Whilst micro SD cards have worked on Intel Atom Bay Trail devices it is only since the v4.7.2 kernel that Intel Atom Cherry Trail devices have had any form of success.
The typical error encountered is:
mmc1: error -110 whilst initialising SD card
mmc1: card never left busy state
and although most Class 10 and below cards from any manufacturer except Sandisk work now without problem some UHS cards still fail. I've found Samsung UHS Speed Class 3 and UHS Speed Class 1 work whereas similar Sandisk cards fail crashing the device sometimes when inserting or removing the card.
Unfortunately some devices still require additional audio drivers or specific device quirks that have not been incorporated into the mainline kernel so sound may only work over HDMI and not through internal speakers or via the headphone jack even though the UCM files have been added. This is part of ongoing Linux development and future kernel releases hopefully will include the drivers required for currently non-working devices.
Suspend/Hibernate/Sleep issues
Suspend in general has been problematic on Intel Atom devices and while new patches are continually being applied to the mainline kernel it is currently not working or incorrectly working on a number of devices.
Brightness issues
Unfortunately as I don't have a tablet I cannot advise on the various screen related issues some users experience using Ubuntu. The best command appears to be 'xrandr' although its use is device specific. Many people have commented in previous posts with their solutions and I've included some of these below.
Most brightness suggestions include:
xrandr --output [device_name] --brightness floating_pvalue (0 <= x <= 1.0)
where you can determine your device by entering:
xrandr -q | grep "connected"
with the primary one being your device.
For example:
xrandr --output DSI-1 --brightness .${BRIGHTNESS}
where the variable BRIGHTNESS can take a value between 3 and 9.
Rotation issues
Some examples that users have posted include:
xrandr --output DSI-1 --rotate right
xinput set-prop <Device Touchscreen> 'Coordinate Transformation Matrix' 0 1 0 -1 0 1 0 0 1
and
xrandr -o right
xinput set-prop 'Goodix Capacitive TouchScreen''Coordinate Transformation Matrix' 0 1 0 -1 0 1 0 0 1
Also others have reported that screen rotation during boot works with 'fbcon=rotate:1'.
Touchscreen issues
These seem to be related to rotation issues and another example of a solution includes:
xinput set-prop "Silead GSLx680 Touchscreen""Coordinate Transformation Matrix" 1 0 0 0 -1 1 0 0 1
which can also be set when matching InputClass section in 'xorg.conf' with:
Option "TransformationMatrix""1 0 0 0 -1 1 0 0 1"
Reporting issues
Comments are welcome but when discussing an issue please include the name of your device and use 'pastebinit' or similar to post a URL to a copy of the output from 'dmesg' (which is basically a log of kernel messages).
To use the 'pastebinit' command (see https://help.ubuntu.com/community/Pastebinit) first install the command by entering 'sudo apt-get install -y pastebinit' and then to share the kernel messages log enter 'dmesg | pastebinit'. This will paste a copy of the output from 'dmesg' to Ubuntu's Pastebin and provide a URL to access it.
So when reporting an issue please include:
- Outline of issue
- Name of device
- URL from pastebin (e.g. http://paste.ubuntu.com/23646692/)
Donate
Please donate if you find the script useful using the following link http://goo.gl/nXWSGf as everything helps with development costs.